Image by Ulrike Mai from Pixabay
Nothing says spring like fresh-turned earth, the tender green of young shoots, and a brand-new DIY project!
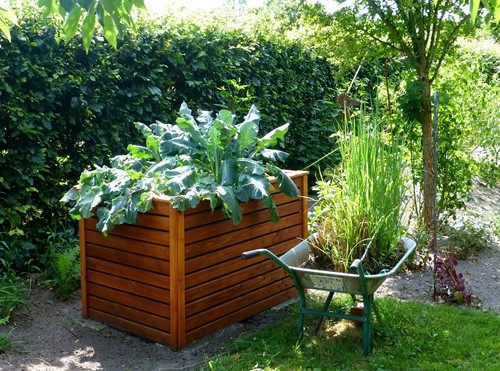
Building a raised bed is a great idea for a number of reasons. First, your soil may be rocky or have high percentages of clay or sand, in which case it makes sense to put down topsoil. Raised beds are also one way of leveling sloping land and cordoning off sloping topsoil. Finally, raised beds look neat and keep your plants neat: within reason, they prevent your plants from spreading to your grass and vice-versa.
Choosing Your Location
Make sure that you are choosing your location such that you receive enough sunlight for your plants to thrive. Veggies and many flowers require sun or part-sun, so be sure you don't shade your bed overmuch. If you intend to build more than one bed side-by-side, try to arrange the long sides of your bed north-south so that they don't shade each other!
Choosing Your Wood
The very best wood for raised beds is cedar, redwood or juniper: they're bug- and mold-resistant and have a lovely color and smell. Raised beds made from these woods can last as long as 10 - 15 years. It's possible to use less expensive wood, but you should expect to do more frequent repairs. Other appropriate wood includes pine, fir, black locust or hemlock.
Instructions
1) Assembling the Bed
You can make the bed any size you choose, but make sure that the bed is elevated at least 6" from the ground. To make a bed in which you can access plants easily, be sure it's no more than 4' across, so you need no more than a 2' reach on either side.
Cut four, 2x4 anchoring posts cut to a height such that, when you set them down, they are level with the top of the bed. You may choose to add additional posts alongside the bed, but this is not typically necessary. Set your finished posts aside.
Next, take clamps and press the boards for each wall together. Set the corner posts atop these boards, lining them up with the ends of the longer walls and set back 1.5" from the shorter ones. Once the posts and walls are arranged properly, drill pilot holes and then screw together.
Finally, repeat this process with all four sides to make a box, with the posts on the inside of the raised bed.
You can calculate how much soil you will need by multiplying the length, width and depth of your new raised bed together. For example, if your raised bed is 6' by 3' by 1.5', you'd multiply (6 x 3 x 1.5) to get 27 ft3. A common size for topsoil is a 1.5 ft3, so purchasing 18 bags of topsoil would fill your new bed (27ft3 for your whole bed / 1.5ft3 per bag = 18 bags).
2) Setting the Bed
Take your frame and place it in the correct location. Use a shovel to mark the outside of the raised bed.
Move the frame out of the way and use the shovel marks to tear out the sod, weeds and larger rocks. If your soil quality is adequate, you can stop here. If your soil quality is very poor, you may need to keep digging until you have an extra foot of depth.
You may choose to anchor your bed by digging post-holes and even reinforcing with a small amount of concrete at the bottom of each hole. Make sure you use a level before you finalize the position of your bed! If you use concrete, be sure to let it cure for 24-48 hours.
3) Preparing Your Bed to Hold Soil
If you did not choose a rot-resistant wood, line the edges of the bed with heavy-duty plastic along the inside walls and staple with a heavy-duty staple gun. Otherwise, you may skip this step.
Finally, roll out landscaping fabric along the bottom of your prepared bed with a slight overlap between your sheets, and pour your soil mix inside. Water the bed with a fine mist to allow the soil to settle into place; then, rake the bed to be sure that the soil is more-or-less level.
4) Finishing touches
Once you've planted your chosen plants, consider mulching around them, especially if they are perennials. This can help keep out pests and help retain moisture, as well as keeping weeds away.
If your bed is for annuals, consider mulching the walkway between plant beds! This can help prevent the spread of weeds.
____________________
Best of luck in this and all your new spring projects!
About the Author

Debbie Caldwell
When you first meet Debbie Harris-Caldwell, you are immediately drawn to her charming Welsh accent and the twinkle in her eye. The well-traveled transplant from Wales is quick to set you at ease and time spent with her promises to be time well spent.
Debbie has been a real estate agent for 40 years and takes great pride in her customer service skills. "I make myself available to my customers when they need me, whether it's on a Sunday Evening or after their long day at work. I make my schedule fit theirs. I also keep my customers updated on everything happening with their listings or purchase, I am their conduit for information." She has built a business following her key principles of clear communication, attention to detail, client advocacy, and comprehensive knowledge of the area. Debbie comes to every new transaction with positive energy, determination, a strong understanding of the currents driving the market, and the expertise that comes from a lifetime of experience. She knows the importance of marketing and whether a home is for sale for $200,000 or for $2 million, she always has professional photography done and creates a listing presentation that best shows off her customer's home.